By Drew Hackett
Catching bait doesn’t have to cut into quality fishin time. With a little planning and some easy to find stuff, you can spend your first 2 hours fishing for fish instead of fishing for bait.
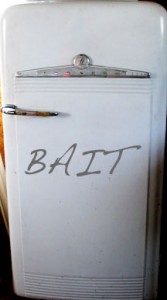
The bait fridge is more than a cold place to store beer, worms, and catfish concoctions… it is a sanctuary. It is a dwelling for all that is sacred to your fishing success. This thought process should always be kept in the forefront when choosing the proper fridge. Think of the bait fridge as a whiskey cask. Some of the finest scotches in the world are cured in used casks that are decades old. Compare that to Jack Daniels who uses a brand new cask for each batch. The result is a formula that choke holds the palette like opposum urine. Just like Jack Daniels, bait from a new fridge should be avoided.
I say older is better, I would take a fridge from the 60’s over a newer one. You know the type, the one that resembles a 5 foot tuna can. They are smaller, but think quality – not quantity. Size is not important, what is important is scoring a finely aged bait cask.
Step 2
The Worm Farm
Raising worms is not for everyone. Those of you who enjoy squatting in the rain at 10 pm looking for a critter that is the exact same color as the mud they lay in can just slide on by to Step 3.
A worm farm consists of a box of worms, peat moss, and cornmeal. You put worms in a box of peat moss, feed them cornmeal and let them multiply. What a concept. My farm is a box that measures about 3x2x1 ft. It consists of a USED plywood top and bottom and barn sheathing sides. It out-produces similar newer models at a ratio of 4:1. I painted the inside of the box to help keep moisture in, I painted the outside of the box so it looks important, stirring the common passerby into a frenzy. Leave it unpainted and it’s just a box of tools or whatnots. Paint it and all of a sudden it’s, “oh, what’s that?, wow.. you’re growing worms!” Your angling stock just rose a few points with that one statement.
Step 3
The Live Tank
You can argue all you want, but I will not accept the nonsense that an artificial bait that “looks and swims just like a real fish” will out produce a real fish that looks and swims like itself. At least not on a regular basis. There are times when you can get sluggish fish to strike a lure on pure impulse. But all in all real bait is the real deal.
The main problem with live bait is the cost. Chubs at the shop are $50 apiece! But the biggest setback is in the wasted fishing time hitting the local crick to fill your bait bucket. So obviously the solution is to keep bait fish ready and available.
You need to start with a tub or container of any sort that can hold 50 gallons or more. This can be easily obtained through your local “guy who can get stuff.” Everyone knows one of these guys. He is the one who takes the request for finding something as a personal attack on his manhood. He prides himself on being able to get stuff, no matter how worthless that stuff may be. Ask him for “a tub that’s about yay big,” and he will do the rest.
After receiving your tub you will want to dispose of the carrion that came inside it. Most of the time the guy who can get things will come back with nonsense that had nothing to do with your request. But this is the guy who can get things, do not question why there are bike tires and a toaster in your live tank. I would even go so far as to acknowledge this landfill fodder as a good will token…” wow, I really needed half of a pulley wheel and some rusty hinges, you’re the man!”
The next step is to make sure it holds water. Just assume it doesn’t and caulk all corners and suspicious looking scratches and gouges. If the tub is an actual water tank with a drain spigot, just lob that off with a 2 lb sledge. Even if it is functional, that is just way too fancy for a proper working live tank. The hole left over can be caulked, glued, or tarred shut with a flattened beer can.
After everything has dried and you’ve filled the tank you will need to add life sustaining elements for your bait fish. These include a de-chlorinator, aerator, branches, and food. The water can be de-chlorinated by simply letting it sit for about 1 week, if you cannot wait you can get a bottle of “Stress Coat” from the fish section at the pet shop. Also pick up an aerator, you wont need a big expensive unit. Mine was about $7 and has worked the last 5 years. Resist the urge to ask the guy who engineers things to create you an aerator, 2-stroke aerators are too expensive to run. You’ll want to add a few branches to the tank to ease stress, stress will kill chubs and minnows deader than hell (and that’s pretty dead). You can feed the fish just about anything; night crawlers, oatmeal, bread, crackers, whatever. I keep chubs, minnows, bullheads, and sunfish all season long using this method.
Filling your tank with fish.
If you’re reading this then you probably already know how to catch chubs and run seins. However, your thirst for bait procuring knowledge has led you to the right place, because I’m about to share with you a tried and true method of keeping your tank filled without even setting foot on a crick bank. It’s an old tactic used by law professionals for centuries. It’s so simple, yet so genius… put a bounty on your bait! Let the area street urchins know you’re paying cold hard cash for bait fish. Now you may be asking yourself why would you even go through the trouble of keeping a tank if you’re just going to pay for bait anyway? My answer is this… you’re not! You will be implimenting a funding source that just so happens to be the largest by-product of fishing – beer cans. I currently have my bounty set at .05 per bait fish. Which means I can bait my hook for every beer I consume! It’s a self sustaining cycle!
I hope you’ve enjoyed this informative manual on how to procure bait. Tune in another day for more blowgut nonsense.

